How To Screenshot on Razer Laptop 2023| 7 Best Screenshots

How to Screenshot on Razer Laptop with a Single Press of a Key
How to screenshot on Razer laptop? Whether you’re working in a meeting room, on a plane, or anywhere else, being able to capture screenshots quickly is invaluable. While it may sound like it could be the most boring thing you’ve ever done, screenshots can actually make or break your ability to generate leads.
There are many ways to screenshot on a Razer laptop, but if you want a way to capture images, videos, and presentations that are easy and quick, try this trick. For your convenience, our editors will use this section to highlight key features, reviews, and other newsworthy information about this product.
The Razer laptop is a powerful gaming laptop with several unique features. It includes the world’s fastest dedicated graphics card, one of the most advanced display systems, the best sound system, and an excellent keyboard that feels good to type on. All of these things make the Razer laptop one of the most popular laptops in the world.
So you’re trying to take a picture of your desktop or laptop screen. Whether it’s to record yourself using software or take a snapshot to present to someone, it’s a seemingly simple task. But if you don’t know how to screenshot, you might end up missing out on some priceless information. So, if you want to take a screenshot on a Razer laptop, here are the steps you need to take:
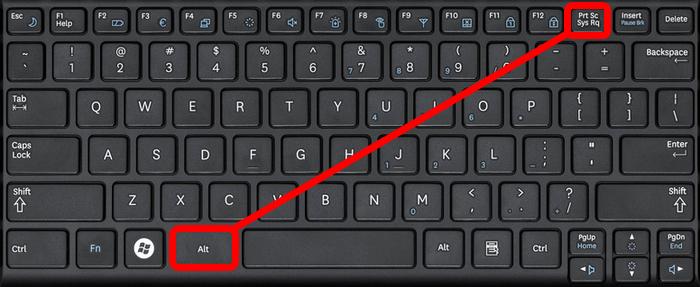
In order to get a screenshot on a Razer laptop, open your web browser. Click on the ‘share’ icon in the top right corner and select “Screen Shot.” Then hit “Print Scrn” and follow the instructions on your screen to save the image.
When you want to capture what’s happening on your screen in an instant, the keyboard shortcuts can save you valuable time. Let’s look at all of the ways to take screenshots on a Razer Blade Pro! This is a comprehensive guide to screenshotting, taking screenshots with Razer laptops, and using them effectively.
1. Choose an image editor
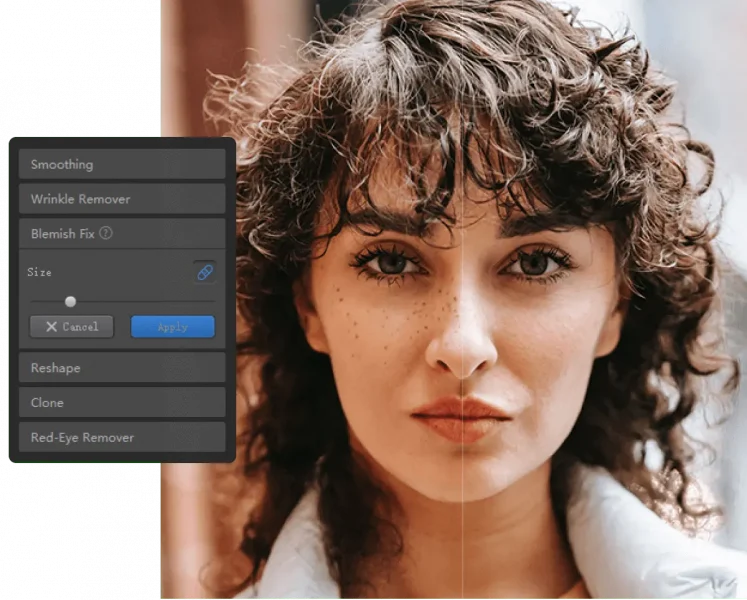
How to screenshot on Razer Laptop? After taking a screenshot, it is easy to edit. However, there are different editing tools that we should use. If you are a graphic designer, GIMP is the best. GIMP has many amazing features and can be easily installed. If you’re looking for more options, Photoshop Express is a great alternative. There are many other editors too, but these two are the most used.
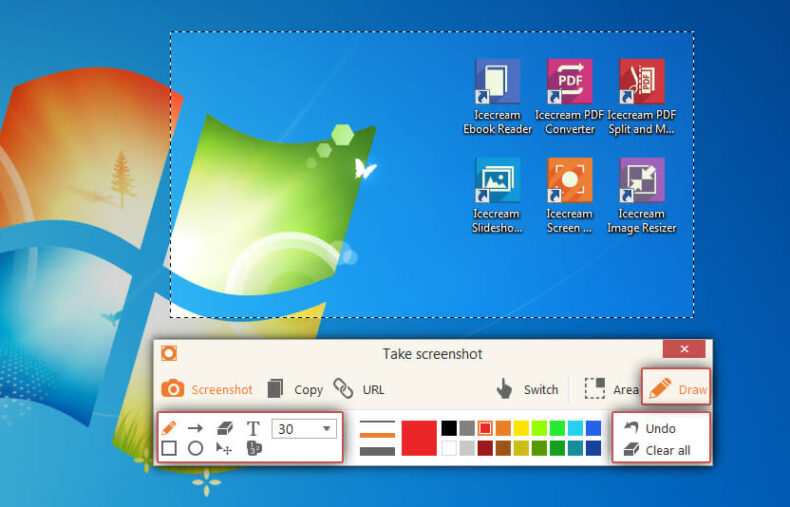
With the advent of the Web, many people are used to taking screenshots of web pages using programs like the built-in Screenshots feature in Chrome or Firefox, or the Screenshot app included in macOS. However, if you need to take screenshots of websites that don’t work with the native Screenshots tool, you’ll need to find a different tool. Many web developers use a program called SnagIt, which is a free download available from www.SnagIt.com. While not perfect, it does the job well enough and is worth a look for anyone looking to make their own screenshots.
Most screenshot tools, including Snapshot, screencaster, Snapz Pro X, and Snagit, let you add a text box to the captured screen. If you need to add some text to your screenshot, choose one of these apps.
2. Find a picture you like
How to screenshot on a Razer laptop? On top of that, you need to find a picture that’s in the same genre as the topic. For example, if you have a blog post on making a logo for your website, you can take a screenshot of a well-designed logo and tweak it to fit your needs.
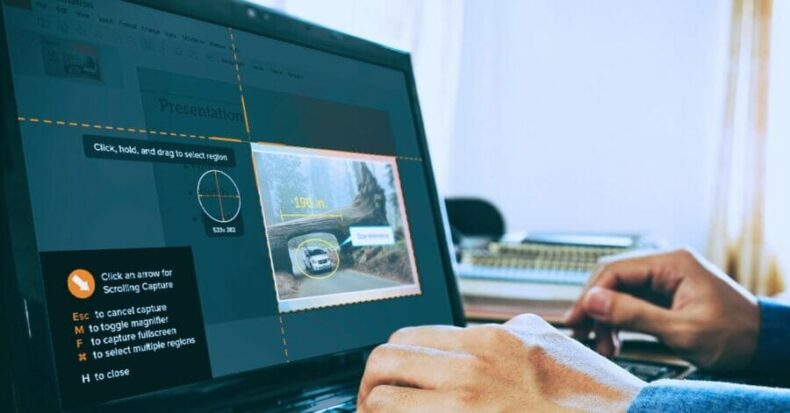
You’re probably familiar with screenshots already, but they’re still an important part of a website or app’s design. Whether they appear within a design document, in a mockup, or as a final design, screenshots help designers understand what’s happening on-screen without actually being there. To create a screenshot, start by making sure you’re capturing the exact moment you want. Try to take a screenshot while the action is occurring.
Also Read. How to Charge Hoverboard With Laptop Charger | 9 Best Ways |
3. Screenshot your favorite thing on your screen
How to screenshot on Razer laptop? Take a screenshot of your favorite thing on your screen. This could be anything: a website you love, a social media image you love, an email you love, a restaurant you love, or a friend or family member who makes you smile. Screenshots are powerful because they act as visual memory aids. The more screenshots you can take, the better. Use a screenshot app on your smartphone. Take multiple screenshots throughout the day and keep them in a folder or in a folder you save on your computer.
4. Open up your image editor
How to screenshot on Razer laptop? How to take an awesome screenshot: Use the print screen key on your keyboard. While you can also use the ‘screenshot’ button on your smartphone, be sure to select the ‘print screen’ key so that your phone saves the screenshot as an image file.
Use a screenshot tool that will capture the entire screen of the computer running the program you’re taking a screenshot of. For example, if you’re taking a screenshot of Photoshop, press Shift + PrintScreen and click anywhere on your screen. Then open the screenshot in the screen capture software.
Also Read. Top 8 Best Laptop for mom in 2022 | Laptopsjet
5. Grab your screenshot
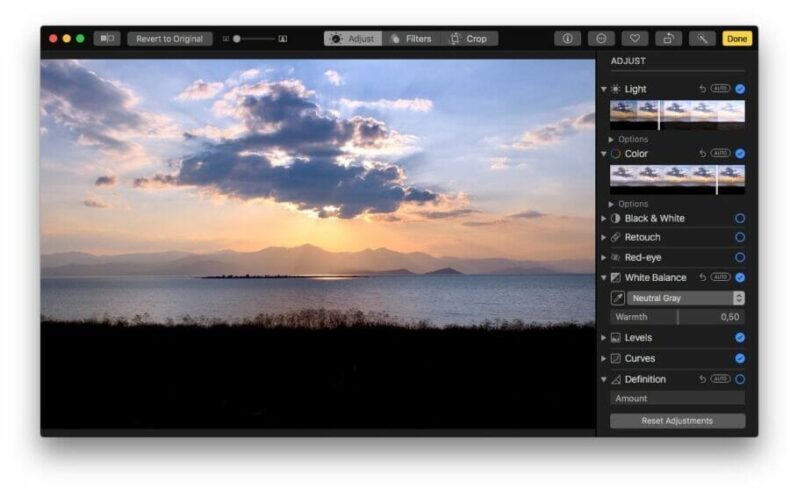
How to screenshot on Razer laptop? It’s tempting to start by just grabbing your camera, and shooting away, but remember that your images can only do so much. If you want to make your blog stand out, the next thing you need to do is take the time to edit your images. Start with a basic adjustment to exposure and contrast, and then use the “auto” option when it comes to saturation, color, and lighting. Once you’ve got the basics in place, head over to Canva to give your images some personality. Using Canvas’s easy drag-and-drop editor, you can play around with the text, colors, and font of your images, and then share them on social media.
6. Edit your screenshot as desired
How to screenshot on Razer laptop? Once you’ve taken a screenshot and you want to edit it in any way, you’ll want to make sure you’re editing in the correct place. The screenshots you take with your phone are meant to be seen on your phone and viewed on a small screen. When you take a screenshot on your desktop computer, you’re using it to create a bigger image that will be printed or displayed in a larger context. To edit a screenshot you’ve taken on your computer, you’ll need to save the screenshot to your computer. After you’ve saved the screenshot, you’ll be able to make changes to the image before you save it again.

How to screenshot on Razer laptop? In a screenshot, you’re presenting the consumer with a moment in time — a snapshot of the current state of affairs. When people read your screenshot, they get to see what’s happening right now, what they can expect to happen next, and how you solved the problem that currently exists. The last thing a screenshot does is make the reader feel anxious or frustrated. When your screenshot shows a solution, it’s likely to make the consumer feel hopeful and excited about the future.
A screenshot that looks great will go a long way to help you stand out in the social media world. But screenshots aren’t just a way to impress the public on social media; they can also be a powerful tool for sales. After all, the main goal of social media is to connect with people and build relationships with your audience.
When you share a screenshot on Facebook or Instagram, you’re essentially giving your audience a sneak peek into the world of your business. Sharing screenshots of products on Instagram is especially good because they don’t have to scroll down to see more details about the product.
Also Read. Top 6 Best laptop for Itunes in 2022 | Laptopsjet
Conclusion
In conclusion, there is no easy solution to this. There are many things that could happen in different scenarios that could stop the screenshot from working. It could be a bad USB port, an incorrect power adapter, a bad power connection, or even a faulty motherboard. If the computer has no power, there is no chance of capturing the screen.
I think the idea of capturing your entire screen is a bit excessive, but it could prove useful for some people. I’m not saying that you should capture your entire screen every time you use your laptop, but having a screenshot of your desktop or the main elements of your web browser would prove invaluable when trying to get something done.