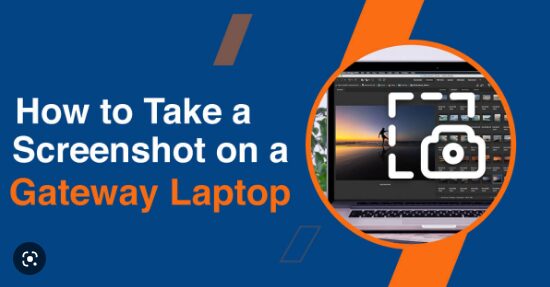
How To Screenshot On a Gateway Laptop? Best Guide 2023
How to screenshot on a gateway laptop?
Screenshots are a great way to capture a web page or a part of a web page on a mobile device. They are a great way to demonstrate a problem with a website or a part of a website. Screenshots are also a great way to share a web page or a part of a web page with a friend or colleague who does not have a smartphone or tablet. In this article, I will show you how to take screenshots on a Gateway laptop.
Gateway laptops are the most affordable laptops that are available in the market. However, these laptops lack the portability of the other laptops. The only way to get the ports is by purchasing a docking station. But, as you know, it’s not always possible to carry around a docking station with you. To solve this problem, we’re going to show you how to take screenshots on a gateway laptop without the need for a docking station.
Screenshots are a great way to document the problems that a customer is facing when using your software. They’re also a great way to communicate with your customers when they have a question or problem. In this post, we’ll show you how to take screenshots on a gateway laptop.
How to screenshot on a gateway laptop?
Most of us are familiar with taking screenshots of websites to save them as a photo or a PDF file. But many of us don’t know how to take a screenshot on a gateway laptop.
Gateway laptops are the cheapest laptops that most of us use. So this might be the laptop you use to take pictures of your food, record videos with your smartphone, take notes, or capture the screen of your web browser.
Also Read. How Long Does a Gaming Laptop Last?
There are three main ways to screenshot a webpage on a gateway laptop:
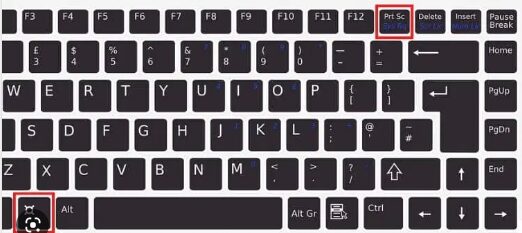
1) Pressing Print Screen
Pressing the print screen is the easiest and quickest way to screenshot a website. Simply press the Print Screen button to immediately capture the entire screen.
To screenshot just a part of the screen, you can click on the area you want to capture and hold down the Print Screen button for the length of time you need to capture the area.
When you are done, you can save the screenshot by pressing the PrtSc button again.
2) Using the Windows Snipping Tool
The Windows Snipping Tool allows you to take screenshots by dragging the pointer over a part of the screen that you want to save. This is the best way to capture just a small portion of a screen.
3) Using Screenshot Plus
Screenshot plus lets you take screenshots using the mouse. To take a screenshot, hover the cursor over the portion of the webpage you want to capture. Then move the mouse while keeping the mouse over the desired area and click the Print Screen button. You can also use the Snap tool to select a particular area and then click Print Screen.
You can also use the screenshot plus function in the context menu, which you get by clicking the PrtSc button.
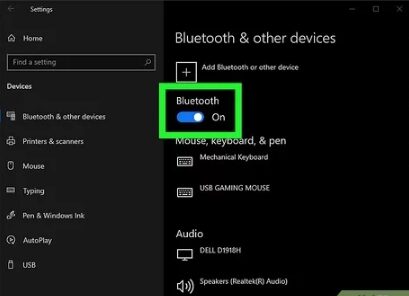
Gateway laptops are computers that are sold with Windows operating system but can only be updated by the manufacturer. So if you are using a gateway laptop, your software is not fully updated.
You will often find yourself trying to use old software on a gateway computer. Most of the time, the software you are trying to use is designed to be compatible with Windows 7 or 8. But sometimes, it might be incompatible. In this case, you may try to install the older version of the software. This could be a major headache.
Gateway computers come with preinstalled software that is made by the manufacturer and is usually limited in function. If you need to update the software, you might have to install it manually. For this to work, you will have to create a bootable disk, which can be a major hassle.
How to take a screenshot on a gateway laptop windows 7?
There are many ways to take a screenshot on a gateway laptop. One of them is to use the Print Screen button on the keyboard. This button will allow you to save a picture of whatever you see on the screen. To save the picture, simply press the button on your keyboard. You can also take a screenshot by pressing the Alt + Print Screen buttons at the same time.
When you are finished, you can paste the image on any photo editings software such as Photoshop or Paint Shop Pro. Another way to take a screenshot on a gateway laptop windows 7 is to go to the system settings. From the system settings, you can press the PrtSc button to take a screenshot. Finally, you can also open the Task Manager, then press CTRL + ALT + PRTSC to take a screenshot.
How to take a screenshot on a gateway laptop windows 10?
If you are using a Gateway laptop with windows 10, you probably don’t know how to take a screenshot on your computer. I am going to show you how to take a screenshot on a Gateway laptop. You just need to press Windows key+Print Screen button on your keyboard to take a screenshot on your Gateway laptop. After you take a screenshot, you can easily share it with your friends and family.
Also Read. How To Tune a Car With a Laptop?
‘How do I manually screenshot on my laptop?

Here’s an easy way to manually screenshot on your laptop. First, open up the folder where you want to put the screenshot and right-click on it. Now click on “Print Screen”. Press Ctrl + V on your keyboard. You will now have a copy of the screen. You can paste the picture you just took on a document and use it to create a presentation.
How do you screenshot on a gateway Chromebook?
To get a screenshot on a gateway Chromebook, you will need to press Ctrl+Shift+F12. Once you have done that, it will show up on the screen. It’s an easy way to save your work to a file so that you can use it later. If you need more information about this, just Google it. You will find lots of useful information online.
Conclusion!
In conclusion, to capture screenshots on a gateway laptop, you need to find a keyboard shortcut that will launch the Screenshot app. Then, when you see the app’s window, you need to press the keyboard combination of keys that will take a screenshot. Once that happens, all you need to do is press Print Screen and wait a few seconds for the screenshot to be captured.
Once you do that, you can open the Screenshot in the Windows image editing tool and crop the picture in whatever way you want. That’s all there is to it. To see how to take screenshots on other laptops, check out this tutorial.